What Is Post-Production?
Post-production ought to be an associate degree plus in each artist’s arsenal once it involves making 3D scenes. But, you use it among the scene. But, is entirely up to you. It may be as affected or as delicate as you would like a Post-Production guide. Used, Post-Production guide will rush up your progress. It takes your renders to succeeding level.
This article has been written to provide you with some recommendations on however Post-Production guide may be used as a conduit tool, instead of simply mistreatment it as associate degree app to feature vignettes.
1. Establish A Selection Set

To me, the foremost vital render part. You may always have (apart from the particular render itself) may be a choice set. These might return below several names: MultiMatte, WireColour, ObjectID. Render Masks or Alpha as an example. Regardless of the name. It’s essential to assist you to create super-fast alternatives for writing or making starts.
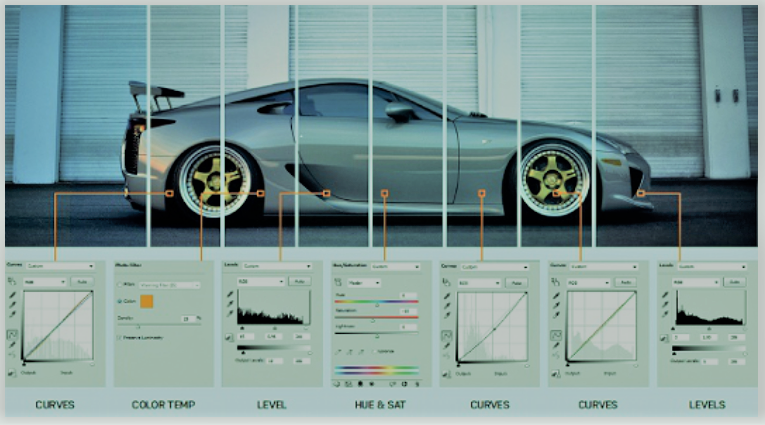
2. To Know Where To Start
Sometimes you may not recognize wherever to start out once commercialism your term into Photoshop to pull it. In terms of my very own progress, I realize it extraordinarily vital to understand what every pass will separately. So once piling the passes so they equal my elegance pass, I flip everyone off and on to envision however they have an effect on the image. Once you recognize however these all work along, you’ll begin to appear for square measures of the image that look too dark, too bright or too reflective, etc.
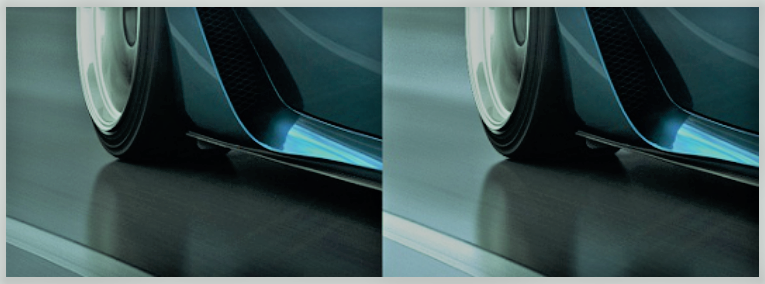
3. Is Your Image Looks Too Bright Or Too Dark?
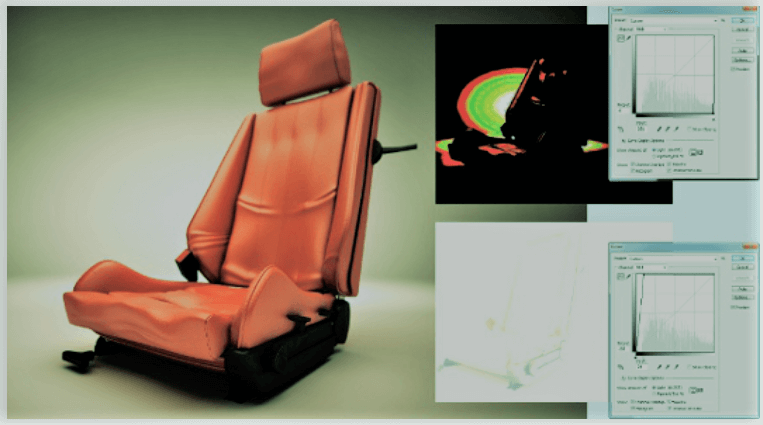
It is important to know if you are pushing color information too far
An easy thanks to seeing whether or not your image has different areas. Wherever it goes on the far side the accepted vary of white or black is by employing a curves regulation level. By tugging the lower purpose on the bar chart to the right, you’ll find if there area unit any areas that transcend white. Moreover, if you tug at the highest point on the graph to the left, you’ll find any areas that transcend black. In case you are doing notice that your image has several areas that conquered these clipping points. You will be ready to save them by adding disposal layers to your remuneration passes. That will bring the extinguisher areas back in.
4. Revise In Short Steps
Photoshop may be an exactness tool, thus set out with little pinch to your remuneration passes (lighting, refraction, specular, reflection). Then, move to color corrections for distinct areas of the photo, then step into general, overall changes.
5. Just Mix, No Need To Mask
If you learn the way to use the Wand tool and choose components of your photo victimization the WireColor move to form masks is incredibly handy. However generally simply masking your regulation layers isn’t enough to form a lot of convincing images these masks ought to amalgamate in. Try this by victimization the Gradient tool or Black Brush tool. This can facilitate your changes sit congenitally into the photography.
6. Try To Paint Volumetric Illuminations
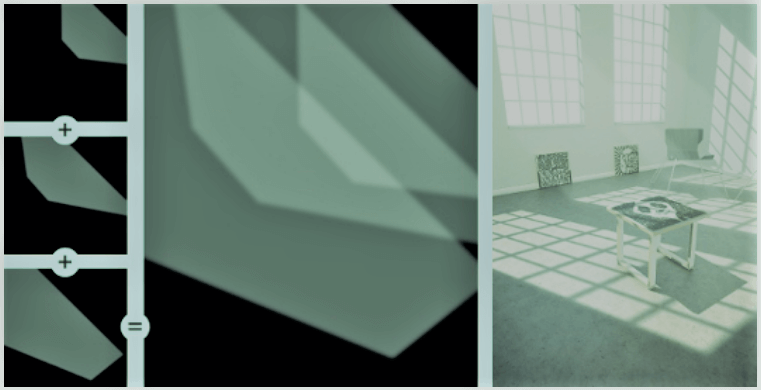
Stacking light helps build depth into an image
Perfectionists might hate Maine for locution this, however generally you only ought to paint your things in instead of rendering them in. It’s to be done cleverly although, and you’ve got to emollient it to form it look believing. I favor meter lighting and that I typically paint it into a site – providing it’s right. During this example image Post-Production guide, I began with the window furthest away and operate unto the camera. This gave me full management over every ‘light’ because it rapt into the room. The photography shows however these meter lights lump up; they’re merely feathered shapes fixed to layer at concerning two-hundredths opacity.
7. Background Need To be Separated

Mask off the image’s background and use the light and shadow data to make a backdrop
A frequent issue, I actually have seen once artists build a studio render. Which is attempting to render the background into the scene? Whereas this may work well, making your background in Photoshop is way quicker. Use your WireColor or Alpha to mask the automobile removed from the background. you’ll be able to then use your lighting or shadow info to have an effect on the background.
8. Bring out your textures
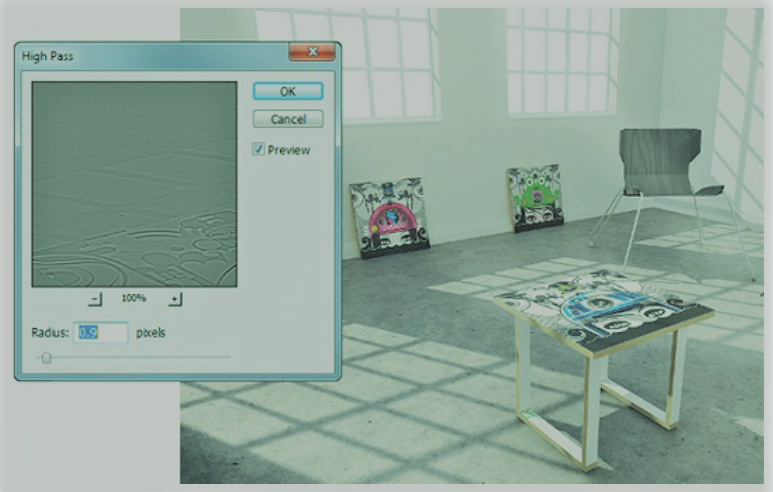
Don’t overdo the use of the High Pass filter – large radiuses can make for undesirable results
A way to create your textures come back to life a touch a lot of is to use a High Pass filter to sharpen them up a small amount. produce a brand new blank layer, then press [Alt]+[Ctrl]+[Shift]+[E] to create a two-dimensional copy of your current image. Desaturate this layer and set the mixed mode to Linear lightweight. head to Filter > alternative > High Pass and use an occasional radius. Toggle the radius to envision however ever-changing the settings affect your image. To use it to full impact, mask it or modification the opacity. Experiment!
9. Why you should stack render passes
Reusing some passes can enhance the render
Adding color corrections can allow you to tweak however the image appearance however it won’t very amendment the render itself. If you have got stacked your render passes properly you’ll apply passes to boost sure areas.
10. Top adjusts
Leave adjustments you want to affect the entire image until the last stage
Adjustment layers should be at the highest of the layer stack to have an effect on the complete image. Use these final layers to alter the general quality of sunshine within the image.